3 Easy Steps to Import Photos from iPhone to Mac
Importing photos from iPhone to Mac can be easy! Follow these 3 simple steps to get your photos transferred quickly and safely.
Step 1: Connect iPhone to Mac
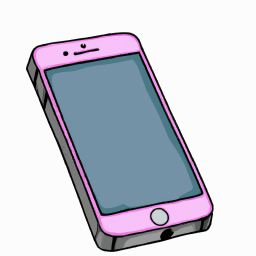
The first step to importing photos from an iPhone to a Mac is to connect the two devices. This can be done via a USB cable, or through a wireless connection like Bluetooth.
Using a USB cable is the fastest and most reliable way to connect an iPhone to a Mac. To do this, start by plugging one end of the USB cable into the iPhone's charging port. Then plug the other end of the cable into one of the USB ports on the Mac. Once the two devices are connected, the iPhone will prompt you to "Trust This Computer" on the iPhone's screen. Tap "Trust" to confirm the connection.
If you prefer to connect wirelessly, you can do so via Bluetooth. To do this, open the System Preferences menu on your Mac and select the "Bluetooth" option. Click the "Turn Bluetooth On" button located at the top of the window, then wait a few seconds for your Mac to detect the iPhone. When the iPhone appears in the list of devices, click the "Pair" button next to it. When prompted, enter the passcode that appears on your iPhone's screen.
Step 2: Transfer Photos from iPhone to Mac
Once the two devices are connected, you can begin transferring photos from the iPhone to the Mac. To do this, open the "Photos" app on your Mac. You should see your iPhone listed in the left sidebar. If you don't see your iPhone, click on the "Import" tab at the top of the window.
Select the photos you want to import by clicking on them. You can select multiple photos by holding down the "Shift" or "Command" key while clicking. When you're done, click the "Import Selected" button at the bottom of the window.
The imported photos will appear in the "Photos" app on your Mac. You can view, organize, and edit the photos just like any other photo on your Mac.
Step 3: Manage iPhone Storage
Once you have transferred photos from your iPhone to your Mac, you can free up space on your iPhone by deleting the original photos. To do this, open the "Settings" app on your iPhone and select the "General" menu. Scroll down to the "iPhone Storage" option and tap it.
Next, you'll see a list of all the apps and files stored on your iPhone. Scroll down to the "Photos" option and tap it. You'll see a list of all the photos stored on your iPhone. Tap the "Select" button at the top of the window, then select the photos you want to delete. Once you're done, tap the "Delete" button at the bottom of the window to delete the selected photos from your iPhone.
You can also use the "Manage Storage" option in the "Photos" menu to automatically delete photos that you have already imported to your Mac. This will help keep your iPhone's storage from becoming full.
By following these three steps, you can easily import photos from your iPhone to your Mac and free up space on your iPhone. With the ability to transfer and delete photos, you can keep your iPhone's storage organized and efficient.

Terms of Service Privacy policy Email hints Contact us
Made with favorite in Cyprus